Showing posts with label recipe. Show all posts

Friday, August 23, 2019

Baked Feta Cheese ~ my recipe

Hello everyone!!

It's been a crazy year....maybe the longest break I ever had from my blog. Many things have happened, I'm now back in Colorado with my family probably for good. I will always keep California in my heart as well as all the wonderful places and people I've encountered these last 11 years. My new daily routine helps me now to go back to writing and posting things I like, here on my blog. 

As you already know, cooking is one of my favorite hobbies, I love to share my recipes and try new things. Yesterday I tried a NEW one!! It's a Greek dish. I've never been to Greece, I've seen many pictures of the beautiful sea, which reminds me of the sea where I grew up in the South of Italy.. {it's only 300 miles from my hometown...}

Milos, Greece

Gorgeous, isn't it? So...with images like this in my head, dreaming to be floating on those crystal waters, I decided to cook one of their typical dishes: Baked Feta Cheese.
It's incredibly simple and so delicious!

This is the one I did


All you need is this {it serves 1 or 2 people} :


  • FETA cheese, 8 ounces (not crumbled)
  • Extra Virgin OLIVE OIL, a generous drizzle
  • Kalamata Olives, a handful (I used green olives, they were also good)
  • 1 Red Onion, thinly sliced
  • 2 Ripe Tomatoes, sliced
  • Salt
  • Oregano
  1. Drizzle a baking dish with the olive oil, add the sliced onion, tomatoes and olives. Add a little salt and oregano.
  2. Add the whole piece of Feta cheese on top of the veggies. Sprinkle some oil and oregano on top.
  3. Bake for 1 hour in oven at 350 degrees.
  4. Enjoy with a piece of bread!

.1

.2


Buon appetito!!!

Let me know if you try this dish and how it came out! I'd love to hear!


Love for now.

xoxo,


Friday, November 24, 2017

~My Apple Pie~

Happy Thanksgiving!!!

Yes, I know the actual date was yesterday... I spent it with my family and some friends (mostly people I didn't know), but I didn't have to cook!! I'm always so excited for the holidays because I have an excuse to cook all the amazing dishes that normally I wouldn't prepare. So....we decided to celebrate today, just us. I enjoyed myself cooking all morning and sharing a delicious meal with my loves, really feeling thankful for ALL that God has done for me, especially the gift of my husband and children.

I want to share with you my Apple Pie. It is my favorite pie to make and to eat. I've recently discovered a website that inspires me a lot. All the pictures are amazing and the recipes too!! I made the pie crust following THE BUTTER HALF 's recipe.. easy and delicious!

This is what I did:

~APPLE PIE~

crust:
3 cups flour
1 tbsp sugar
2 sticks unsalted butter, cold and cut in cubes
1/2 cup ice water
1 beaten egg (for brushing)

filling:
3 large apples
1 lemon (zest and juice)
2 tbsp cornstarch
1/2 cup brown sugar

  •  Mix butter, sugar and flour in a food processor (or in a mixer using the leaf attachment) trying to be quick, not to let the butter melt. When it's all crumbled, add the iced cold water. Mix rapidly until it sticks together. Form two balls and let them rest in the fridge.
  • In the meantime peel the apples, take out the core and slice them very finely. Put them in a bowl mixing the rest of the filling ingredients.
  • Roll the dough for the bottom part of the pie and cover a 9 inch pie pan (grease the pan before laying the dough). Poke the bottom with a fork, add the apple filling.
  • With the second ball of dough you can use your imagination. You could just roll it thinly to perfectly cover the top and give it a rustic, old-fashioned look, or you can be creative a make your own design. 
  • Brush the top of the pie with the beaten egg.
  • Cook for 35 minutes in preheated oven at 345 degrees or until golden and beautiful.
As you can see from my pictures below, I cut 4 wide strips of dough and a few decorative flowers with a cookie cutter. You can find "pie crust cutters" HERE .


Let me know if you try this recipe! I would love to see how you decide to decorate your crust. 

Ciao for now.
xoxo,


Tuesday, May 23, 2017

Sweetest tea party


I've always loved a cup of tea in the afternoon. Today I prepared some scones from scratch for the first time. I had recently bought a jar of clotted cream, as I was so curious to see what it tastes like, and I know it needs to be spread on scones together with delicious jam. 

The scones came out delicious (I followed this RECIPE).


The clotted cream can be described as a fluffy, sweet butter. It was fresh, dense and it created a perfect marriage with the jam. I am not deceived but very happy with my purchase. It's a product of England, not easily found in the States unless it's imported.
You can order some HERE .

              xoxo,


Friday, May 12, 2017

Matcha Love ~ Yes or No?

Hello everyone!!

I was wondering if also you have the "matcha fever"..I don't even know if that's a thing, but I have been noticing more and more how popular matcha is becoming. If you are among those who don't know what I'm talking about, you can get instructed through this LINK and wikipedia will magically answer all your questions.

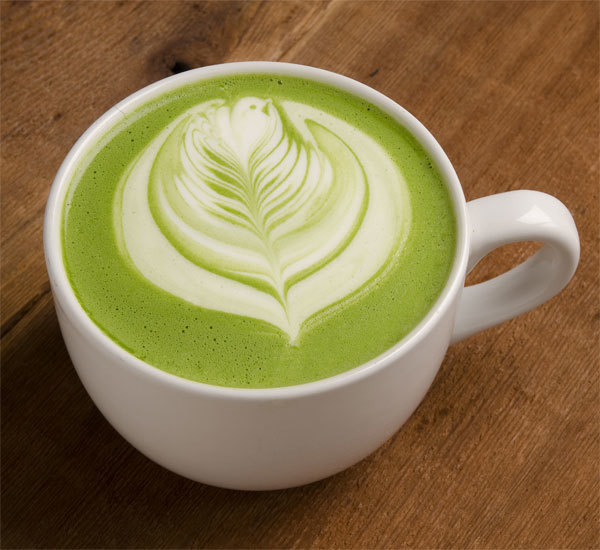
Have you ever tried a "matcha Latte"? It's something looking like this:

Image result for matcha latte
You can find the recipe here from bon appetit


You'll need this for the Latte recipe.


It looks and sounds delicious, a creamy green tea... kind of like a mixture between a tea and a cappuccino! It's on my wish-list of new drinks to try.

My only experience with matcha is the KitKat candy bar!! I was so fortunate to have a friend traveling through Japan, I asked him to buy me one "green KitKat" and he brought me a whole box!! I have been sharing the delicious treats with my husband and kids. I posted a picture on my Instagram and a few people were curious about it...so I decided to share the link where you all can find it without having to go to Japan! You need to try it!


Happy Shopping!!

Please let me know your experience about this new trend!! Have you tried anything matcha? Do you like it? Leave a comment if you like.

xoxo,


Wednesday, April 19, 2017

Madeleines Cookie Recipe

Bonjour!!!
Yes, this is the proper way to start this blog-post as today I'm going to share with you one of my signature recipes.... the Madeleines Cookies, those delicious French little pastries, or soft cookies; I love them so much and they are a big success every time I have guests.
I made them this morning and I took pictures to give you a step-by-step photo-recipe. Are you ready?

Here it is!


Recipe for 12 cookies

INGREDIENTS
  • 2 EGGS
  • 2 tbsp SUGAR
  • 2 tbsp POWDER SUGAR
  • 1 tsp VANILLA EXTRACT
  • 1 tsp ALMOND EXTRACT
  • 1/4 cup SELF-RAISING FLOUR
  • 1/4 cup regular FLOUR
  • 6 tbsp BUTTER
  • 1 tbsp HOT WATER
  • extra powder sugar for dusting


Mix eggs, both sugars and extracts until smooth.

 
Add both flours, sifted together, and keep mixing.

 Melt the butter and slowly add it to the batter, also the water.

 
Pour the batter into a Madeleines` pan. After having carefully buttered and floured it.

 
Cook in preheated oven at 400 F degrees for 10 minutes.


You will see that a little dome will form on top of the cookie...that's a perfect result! They are so good with a cup of tea or coffee. The only indispensable tool is the Madeleines' pan, if you don't have one you can find it here:


Let me know how they come out!!!

xoxo,


This recipe is my own and as an amazon affiliate, I will receive a small commission if you click and buy from my links. Thank you!

Wednesday, April 12, 2017

My Ricotta Cake

Goodmorning!!
it's Spring Break and my children are all home. They are still all asleep, I was able to wake-up early to sip my big cup of caffe'-latte while reading the news and catching-up on my instagram feed, I love checking everybody's pictures and new posts, it gives me a lot of inspiration.
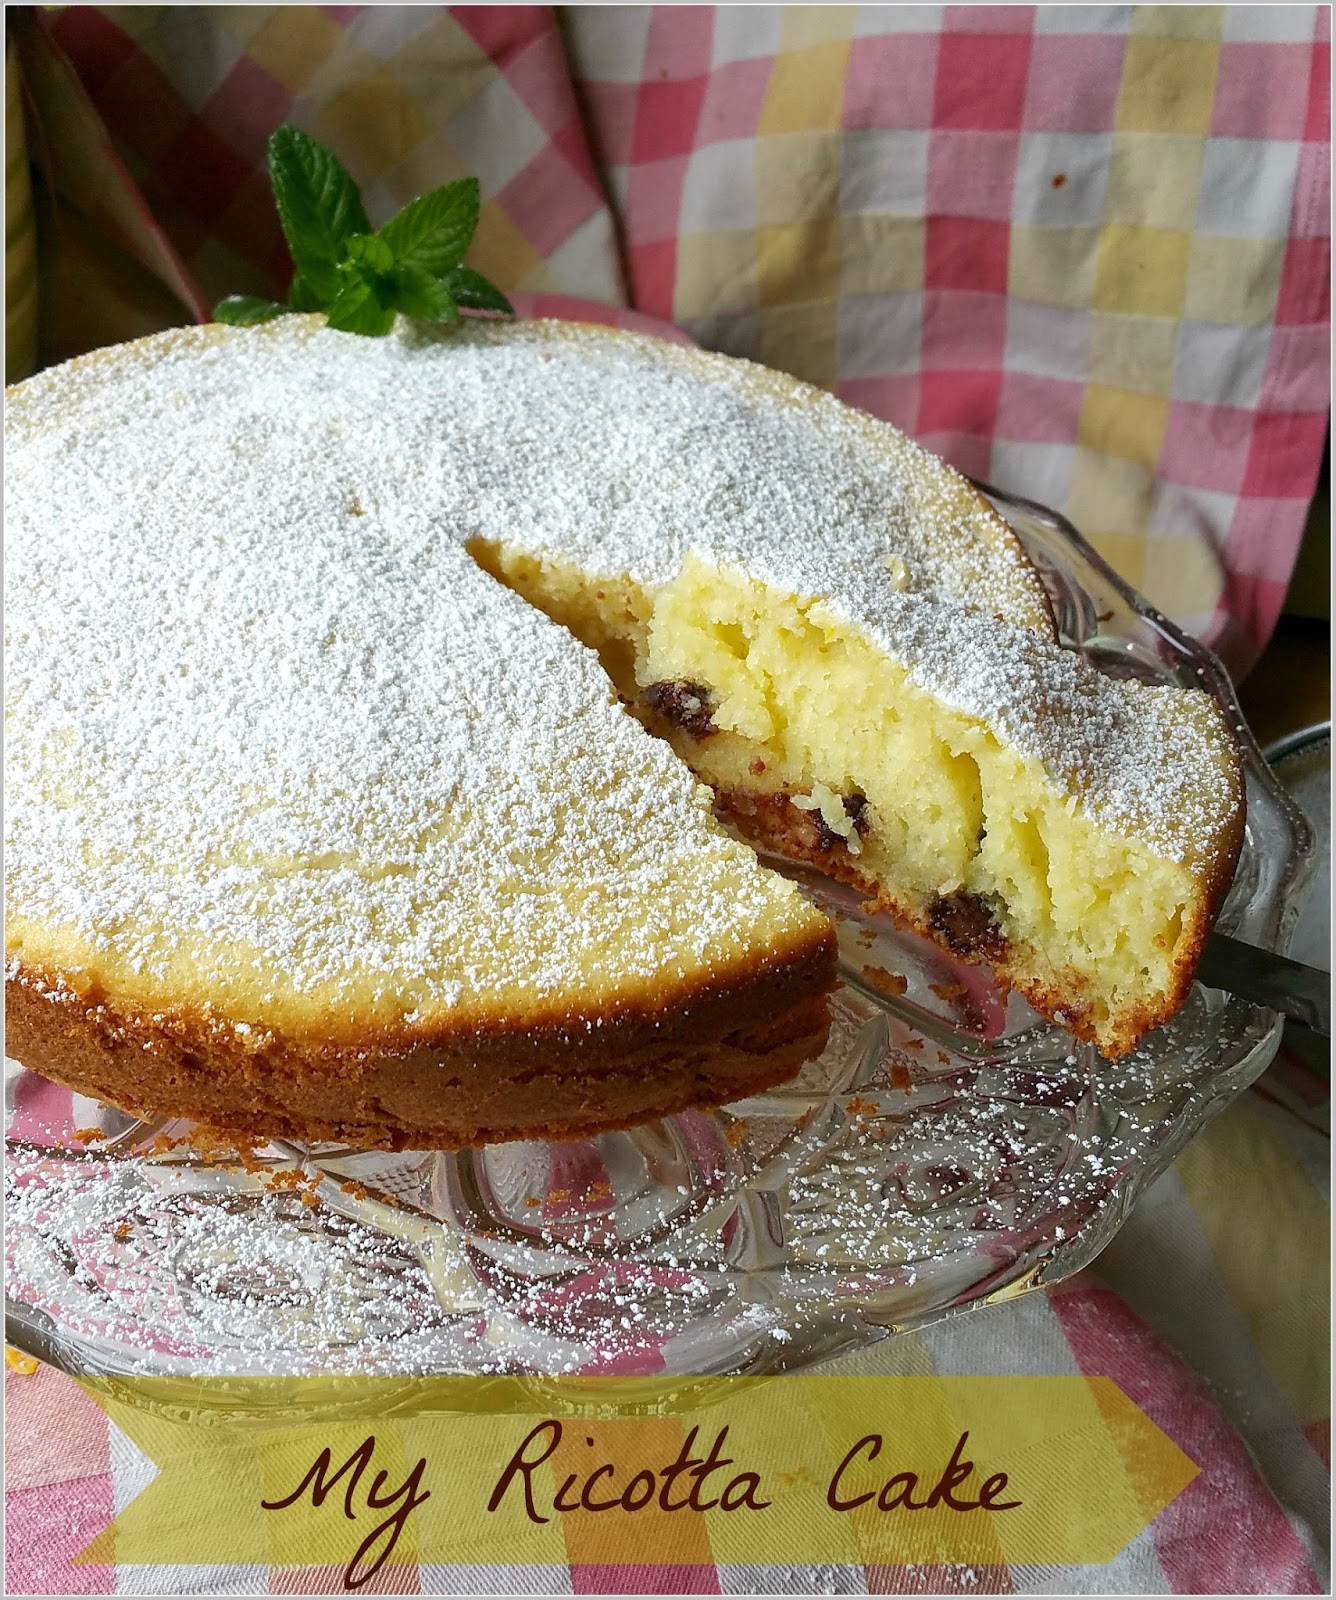
So, in this time of peace and calm I'll take advantage to share with you a delicious cake I made a few days ago. In Italy it's a classic: the Ricotta Cake. I used to make it all the time, then somehow I forgot about it, maybe because here in the States I never eat ricotta, as it's very different from the one I was used to eat. I saw a recipe online and I suddenly remembered the taste and how soft and tender that cake was. I had to make it!! I adapted the recipe to my taste and memories.
Here it is.

MY RICOTTA CAKE


Ingredients:

  • 3 EGGS (whites and yolks separated)
  • 1 cup of SUGAR
  • 7 tbsp of BUTTER (melted)
  • 1 cup of RICOTTA
  • 1 cup of FLOUR
  • 1 tsp of BAKING POWDER
  • LEMON ZEST (1 lemon)
  • 1 cup of CHOCOLATE CHIPS (semi-sweet)
  • POWDER SUGAR for dusting
  1. Beat the egg yolks with the sugar until fluffy and pale yellow. 
  2. Add the ricotta and keep mixing until smooth and the melted butter.
  3. Sift-in the flour together with the baking powder.
  4. Beat the egg whites until firm and gently add them to the batter, mixing softly, making sure they don't get flat.
  5. Gently mix-in also the lemon zest and at last the chocolate chips.
  6. Grease and flour dust a cake pan (9 inches), add the batter and put in preheated oven at 350 F degrees for 30-35 minutes. (Always insert a tooth-pick in the cake to check if it's well cooked. If it comes out clean, it means the cake is done). 
  7. Dust your cake with powder sugar and serve.
It's a very simple recipe and you'll see how good it is!! Everyone will love it! My children were a little skeptical at first but they ate it all! I hope you'll enjoy it as well.

xoxo,


Friday, March 31, 2017

Lemon Bundt Cake Recipe ~ Ciambellone recipe

Hello Everyone!!!

I noticed it has been a while since I have shared a recipe on this blog. I cook a lot everyday, of course I need to feed my five children and husband, but I mostly do it because I love it. Yes, I cook lunch and dinner....and "merenda" everyday. Merenda is the Italian word for "snack-time", you know, the little snack children need after school. I usually bake a cake. The one I want to share with you is from a recipe I learned last year from a very good friend. It's called "ciambellone" {pron. CHAM-BELL-OH-NAY}...meaning "big donut". It's absolutely not a donut, it just has the same shape. :) Here it is:


CIAMBELLONE recipe {or LEMON BUNDT CAKE}

Ingredients:
  • 1 -1/4 cup of SUGAR
  • 3 EGGS
  • 1/2 cup of VEGETABLE OIL
  • 1 cup MILK
  • 1-1/4 cup of  FLOUR
  • 1 LEMON (zest + juice)
  • 1 tsp BAKING POWDER

  1. Mix well the eggs with the sugar until fluffy.
  2. Add slowly the oil, the flour, baking powder and milk.
  3. Grate the zest of the lemon, then add its juice.
  4. Pour the batter in a greased bundt cake mold.
  5. Cook in oven at 180 degrees for 30 minutes. 

Please enjoy!!! My family loves it, it's usually all gone quickly. Let me know if you make it and how it comes out!! 


xoxo,


Sunday, February 5, 2017

~Banana chocolate-chip muffins~

Hello everyone!!!
today is Sunday and that's when we usually have a little extra time to make something special for our kids, or just for ourselves.. ;) One of the things of everyday life I really enjoy is cooking. I recently found a delicious recipe that is perfect for an afternoon snack or even breakfast. I'm talking about Banana Chocolate-chip muffins! They are perfect especially when you have a couple of bananas getting darker and darker on your kitchen counter... how many times that happens in my house....... well, if that's the case, look for a couple extra ingredients and make these!! You won't be disappointed.

BANANA CHOCOLATE-CHIP MUFFINS 
(ingredients for 12 medium muffins)


  • 3 ripe BANANAS, mashed
  • 3/4 cup SUGAR
  • 1 EGG
  • 1/3 cup BUTTER, melted
  • 1 1/2 cups self-rising FLOUR
  • 1 cup of CHOCOLATE-CHIPS
Mix sugar and egg to the mashed bananas. Add melted butter (you can use margarine if you prefer). Add the flour (if you don't have the self-rising kind, just use the regular flour + 1 tsp of baking powder) and mix well. Add chocolate-chips at last folding them in the batter.
Pour the batter into muffin molds and bake at 375 degrees for 15-20 minutes. I check if they are cooked inserting a tooth-pick in one of the muffins, if it comes out clean it means they are ready!!


I hope you like them!! Enjoy them with a cup of coffee or tea! Let me know what you think.

xoxo,


Tuesday, April 14, 2015

Rustico ~ a delicious recipe from my town.


Hello Hello!!!
I have been asked to write the recipe of this delicious treat. I have published it on my Recipe Blog... but it's in Italian {here is the LINK, if you are interested}. I'm translating here the recipe in English for all those who would like to try it without using google translate... because who knows what would come out!!! :))
If like me, you use the frozen puff-pastry it will be very simple. Here we go:

INGREDIENTS
  • 2 sheets of frozen PUFF-PASTRY
Bechamelle Sauce
  • 2 cups of warm MILK
  • half stick of BUTTER
  • 3 tbsp of FLOUR
  • SALT
  • PEPPER
extra ingredients for the filling
  • a can of PEELED TOMATOES
  • 1 cup of FRESH MOZZARELLA
  • 1 EGG
  1. Thaw the puff-pastry.
  2. Prepare the bechamelle sauce:melt the butter in a small pan on medium heat. When melted add the flour. Mix well, always stirring. Add the milk very slowly, always stirring, until it becomes a cream. Add salt and pepper. 
  3. Every rustico is formed by 2 discs of puff-pastry (diameter of 5-6 inches), you can also make it square... any shape you like.
  4. Put a dollop of bechamelle in the center of the first disc, add 3 chunks of mozzarella and one or two well squeezed can tomatoes. Add a pinch of salt.
  5. Beat the egg to use it as a "glue" to attach the two puff-pastry discs together. Brush the edges of the first disc and close the rustico covering the filling with the second disc, pressing well the edges to form kind of a dome on top.
  6. Brush the whole surface with the rest of the egg-wash.
  7. Use the rest of the puff-pastry and ingredients to make 2 or 3 more rusticos.
  8. Bake in pre-heated oven at 400 degrees for 30 minutes.

Well, that's all!!! I hope you like it... and if you make it... please let me know!!!!! :)
 
xoxo,

Monday, February 3, 2014

Rich & Creamy Hot Chocolate {Italian style}

Hello everyone!

How many of you watched the SuperBowl yesterday??... well, I hope you were all SeaHawks' fans, because for the Bronco Fans it has not been a very good afternoon.. :(
It was so disappointing that at the end of the game I had to find a way to cheer up and the first thing that popped in my mind was the Hot Chocolate I used to drink in Italy. What's better than a dense and luscious hot chocolate?? And when I say dense I mean it! Every time I make hot chocolate for my children (the store-bought kind) it's basically a hot chocolate-milk.  The kind I used to drink is like velvet, it sticks gently to the spoon.. but it's at the same time liquid enough to drink.
If you have never had it you should try it... and the secret is very simple!

RICH & CREAMY ITALIAN STYLE HOT CHOCOLATE

  • Your favorite kind of Hot Chocolate {I used the "double chocolate" Starbucks brand}
  • 1 full tsp of Corn Starch each serving
  • sugar {only if you need it}
  • Cold Milk
Mix the cocoa powder and the corn starch together in a pot. Add as much milk as directed (usually one cup per serving). Stir on low heat... never stop stirring! Let it boil a little bit and serve hot.

 
Yesss! The corn-starch does the magic!
 
What's your favorite kind of hot-cocoa? Share your recipe... I would love to know!!!
 
xoxo,


Sunday, September 15, 2013

Cappuccino with Nutella ~recipe

Yesss!! The title is right!! Have you ever tried coffee with nutella?? The first time for me was last July in Brazil. Me and my husband stopped in a café and that's what I ordered.... right away!! It's useless to say that it was de-li-cioussss... The inside of the cup was completely spread with Nutella, the coffee and milk was hot and covered with a big cloud of sweet whipping cream! I remember I was so tired that day... I really needed that treat!
When I came home I tried my own version... I didn't have whipping cream that day.. so I simply made a Cappuccino {coffee and milk with a luscious foam on top} with Nutella.

All you need is:

  • Espresso Coffee
  • Milk
  • Nutella
  • Sugar
  • (+ whipping cream, as you desire)

Spread a layer of Nutella inside your mug, or coffee cup, letting it gently overflow. In the meantime make the espresso, sweeten it the way you like, warm up the milk and foam it {you can use THIS type of frother}.  Pour the coffee followed by the milk in your cup....and voila'!!!! Enjoy your treat!! And remember to have a spoon with you to "clean up" your cup from the remains of melted Nutella...

 my Cappuccino version...
 
from the Brazilian café.... isn't it to die for????? :)
 
Have a great Sunday!!!
 
xoxo,


Wednesday, June 19, 2013

Best Summer Drink ~ Lemon Italian-Ice Recipe

What can I say.. summer heat is on and it's time to get refreshed with a delicious drink!
Today I want to share with you a secret recipe of the most delicious "Italian-ice"... in Italian it's actually called GRANITA {probably because it's as hard as granite??}, it's a very popular homemade summer treat. You can eat it by itself in a cup or enjoy it in a drink. It's really good mixed in a glass of ice-tea... but my favorite way to eat it is in a big glass of Coke! {did you know I'm addicted to Coca-Cola?}.. just add a few big chunks to your drink, they will replace the ice-cubes and will slowly give a lemony flavor... :)
Ok, here is the recipe:

Lemon Italian-Ice  { a.k.a. ~ Granita di Limone ~}

  • 4 big lemons
  • 4 cups of water
  • 1 cup sugar
Boil the water with the sugar, until dissolved. Let it cool down.
Squeeze the lemons and add their juice to the sweet water.
Pour the mix in a container (preferably with lid) and put it in the freezer until completely frozen (it should take a couple of hours).
Take it out of the freezer 20 minutes before trying to serve it... it will be very hard! Use a strong spoon to scrape the ice.
Serve it in bowls or in your favorite drink.
 
Enjoy!!!


xoxo,


Wednesday, April 10, 2013

Pistachio Macaroons Recipe

Who said that to taste a macaroon {sweet and elegant little cookie} you need to find some fancy pastry shop or go all the way to France?? I made them home today!!!! It was fun and not that difficult at all! ..yes, it's true, some came out not perfectly round or a little cracked on top, but the taste.... mmmmmhhh... just divine!!!!
I found the recipe on a book I bought last Christmas, I've been dreaming to make these cookies and post about them since then! I want to share my recipe version with you:

~Pistachio French Macaroons~
{filled with White Chocolate Ganache}

INGREDIENTS:
1/3 cup roasted unsalted pistachios
3egg whites
1/4 cup sugar
green food coloring
1 1/4 powder sugar
3/4 cup ground almonds

FILLING:
1/4 cup whipping cream
5 oz. white chocolate chips
2 tsps. honey
 
  1. Pre-heat the oven at 300 degrees. Line cookie trays with baking paper.
  2. Process nuts until finely ground.
  3. Beat egg whites with electric mixer until soft peaks form. Add a few drops of food coloring and the sugar little by little, keep beating until the sugar dissolves. Fold gently in the egg mixture the ground pistachios, the  powder sugar and the ground almonds.
  4. Spoon mixture into piping bag fitted with 1/2 inch plain tube. Pipe 1 1/2 inch circles about 1 inch apart onto baking sheets. Sprinkle the macaroons with a little bit of remaining ground pistachios. Let them stand 15 minutes before putting them in the oven.
  5. Bake macaroons for 15-18 minutes. Let them cool down.
  6. Meanwhile make the white chocolate ganache.
  7. Sandwich the macaroons with the ganache.
  8. For the Ganache: Bring ream to boil in a saucepan. Remove from heat and add the chocolate and honey. Stir until smooth. Stand at room temperature until spreadable.
So, what do you think? Are you going to give it a try? Let me know if you do!!!
Mine didn't come out green because I forgot to buy the food coloring!! So... they are not as pretty a they should be.. next time I'll do better, but I'm happy with the results of my first try... ;)
 
 
Sweet Hugs to you all!!!
 
xoxo,


My post is featured here: Link Up!


Wednesday, December 12, 2012

Peppermint Cupcakes!

So much going on in these days!!!!! We are looking for a new house, as we need to move out from the one we live in... we don't have much time. I hope to find it tomorrow and move-in in two days!! Am I asking too much?? :) I've also been busy {not too busy unfortunately} with some orders in the shop, thing that always makes me very happy.. Then the kids going to school, home-works, different meetings.... so.. what to do in this type of situation?? You know what I like to do.... BAKE!!!! It takes the stress out of me, I enjoy baking and I love the results.. he he ;) especially in the recipe that I will share with you today.
I was reading one of my favorite blogs, The Freckled Fox , when I saw the recipe of Peppermint Cupcakes!
At first I thought it sounded kinda weird, I couldn't imagine how the combination of flavors such as mint and cream-cheese could go well together, then I kept on reading and I was suddenly inspired and convinced by the gorgeous Emily {author of the blog}. I went to buy all the ingredients I needed and I started baking!
They came out so pretty....and so delicious!!! You won't believe your taste buds!!!


This cupcake is for sure a perfect treat for Christmas! The taste of the minty candy-cane makes it really special. I know you want to try it now.. so go get the recipe in Emily's blog!! You can find it HERE , it's very simple and fast to make. You won't be deceived.
Happy Baking!!!!!

xoxo, 


Friday, October 12, 2012

Zucchine Ripiene ~ Stuffed Zucchini

There is a lot going on in this little life of mine. But right now, what I want to share with you is a suuuuper delicious recipe! It's time to use Zucchini.. they are so cheap in every store!! And I have to say it's one of my favorite vegetables... I use them in everything: with pasta, as a side dish, in a parmigiana or.. as in this recipe... STUFFED!! You're going to love them!!


ZUCCHINE RIPIENE  {or STUFFED ZUCCHINI}

What you need:

  • 4 large zucchini
  • 1cup of bread crumbs
  • 1 cup of shredded Parmesan Cheese
  • 1 handful of minced Parsley
  • 1 egg
  • salt & pepper
  • extra vergin olive oil
  • tomato sauce
Cut the zucchinis in half longways. 

Let them boil in hot water and salt for 4-5 minutes, until barely tender (don't over-cook them!). Drain them, let them cool down and take the pulp out with a spoon (don't throw it away, let it drain in a colander or squeeze the water out). 

Prepare the filling in a bowl. Mix together the egg, parmesan cheese, bread crumbs, parsley, the zucchini pulp with a little salt and pepper. 

Grease a pyrex with olive oil, fill the half zucchinis with the filling and set them in the dish. Cover each of them with a little tomato sauce (previously seasoned). Sprinkle with parmesan cheese and olive oil.

Cook in the oven at 400 degrees for 20 minutes, or until golden brownish. :)

Serve hot as a side dish or main dish with a nice piece of bread!

~Buon Appetito!!


Hugs to all,