Showing posts with label DIY. Show all posts

Sunday, February 12, 2017

~Cute Mani DIY~

Happy Sunday everyone!!!
Today I want to share with you a little DIY on how to be creative with your nails. Valentine's day is very close... just a couple of days away.. if you are like me who likes to have pretty nails {Mom's life doesn't allow me to have them pretty for very long....} and cannot afford to pay for a manicure, I have a little secret on how I make my own cute decorations. Yes, most of the time I simply paint my nails, but when I find the time to be more creative this is what I do:


WHAT YOU NEED:
  • at least 2 shades of colored NAIL POLISH
  • clear Nail Polish (for a shiny final look)
  • small SCISSORS
  • WASHI TAPE

Cut a piece of washi tape
Fold it and cut half heart
Gently open the tape and you'll have a full heart


Place the tape on one of your painted and dried nails, paint a coat of a different color polish, blow on 
it and carefully remove it. The last thing to do is a final coat of clear polish. Et voila'!!!

I chose a heart because of Valentine's Day and because I love hearts... but you can cut out anything! A circle, a diamond, a star...depending on how good you are with scissors!! You can even do simple lines like I did for my daughter:


I hope you like this idea. Be creative!! That's all it matters and you'll have cute mani and save lots of money! :)))

xoxo,

Products I used:


Thursday, February 27, 2014

How to crochet a heart with HappyBerry crochet..

Hello friends!!!
it's still February.. the month of Love ad hearts.. I've been wanting to write a post on crocheted hearts and I'm still on time!!... even if I think anytime is always the right time to speak about hearts... :) 
I recently found a beautiful website about knitting and crochet.. they have a BLOG, a SHOP and a you-tube channel! They are called HAPPYBERRY. Cute, eh? You need to check them out... they even have adorable free patterns
I'll share with you the you-tube video on how to crochet a heart. I've tried to crochet hearts before in different ways...but I think this is my favorite result! Also, the girl who teaches the technique is really sweet... not boring at all.. and has a cute British accent!! She sounds like Keira Knightly or Emma Thompson {I don't know if you a fan of English actresses like me...}...
So, what are you waiting for?? If you know how to crochet..you will learn how to make a cute heart... and if you don't know how to crochet... you will just learn!! :)

These are just 3 of my little hearts. I'm thinking to crochet a couple more and make a bunting banner.. maybe a cake-topper.. I love the yellow yarn I used.


And now... the you-tube video. Thank you Crochet Berry for allowing me to show and share your beautiful work!!! :)


Hugs and kisses to you all!! until next time!!!

xoxo,


Monday, May 13, 2013

Homemade Cheese?... Yes please!!

Helloooo!!
Happy Monday to you all!!!
If you have followed me for a while, you know how much I love handmade, not only in crafts, but especially in the kitchen. I always cook from scratch, it's something that is part of my culture {you would never see me use a box to make a cake}. I know that many times it's easier and faster to use stuff already prepared, if they are available... why not? But I just love to make my own food.
My husband, even though he is not Italian, likes to make food from scratch as well {he has worked many years in a delicious Italian Restaurant called Parisi in Denver, CO} and I recently spoke about a product that I found on Etsy that I love so much: a kit to make your own fresh cheese!!! How cool is that? I bought it for him and when we received it super fast... we already made a batch of our on fresh Mozzarella... one of my favorite cheeses in the whole world. :)
Here's a few pictures of the product and the making of the cheese. The whole kit comes with a precise description of how to make the cheese, it was easy and it came out super good!!!


 our fresh Mozz!!!

You can make your own as well!! Go check out this awesome shop:

UrbanCheeseCraft

There's not only Mozzarella, but a big variety of fresh cheese!
You should try it....;)

xoxo,


Thursday, February 28, 2013

DIY pretty Necklace by Kayla

Hello everyone!!! Today I'm so excited to have Kayla over to my blog again!! She's going to share with us a DIY to make an amazingly cute necklace. :) Just look at her! I know you want to make one too... let's see how....
 
 
Hello friends! My name is Kayla from Love Sparkle Pretty and I'm so thrilled to be on Luisa's blog today! She really is the sweetest! :)

Today, I am going to share a super easy DIY tutorial to make your own wooden bead necklace. I have seen these necklaces pop up everywhere and I am really loving them. They are so simple to make and yet very versatile and fun to wear!

What you will need:
*6 medium sized round wooden beads
*fine cable chain in color of your choice. You will need 18" of this and make sure it's small enough to thread through the holes of your wooden beads
*a lobster claw clasp with link
*2 small jump rings
*wire cutters
*chain-nose pliers

Most wooden beads come plain with the option of painting them the colors you would like. You can also get some that are "pre-colored." Decide whether or not you would like to paint yours (I painted mine metallic gold) and do so to 6 of the beads.

Once your beads are the colors you would like, get your chain and measure it 18" in length and cut it (with your wire cutters) at that length.


Then, string your beads (once they have dried) one at a time through the cut chain.

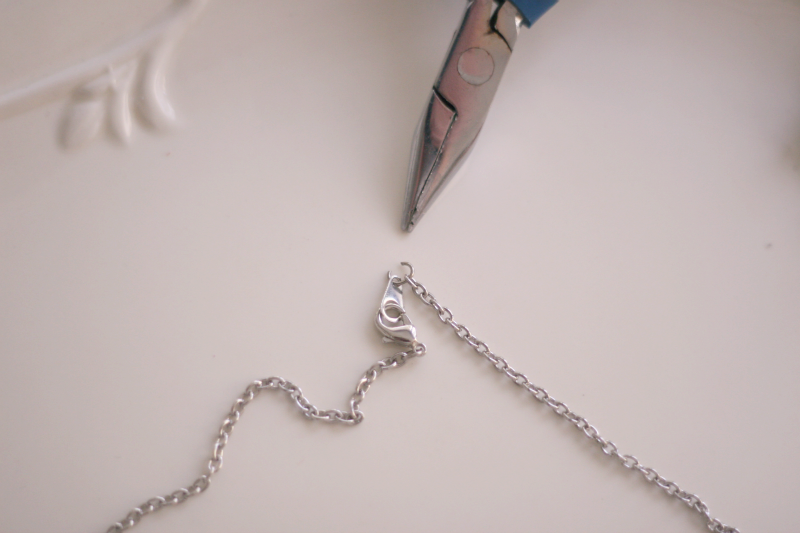
Once the beads are strung, attach a small jump ring to the end of one side of the chain. Then, attach the lobster clasp to the jump ring and close the jump ring.

On the other end of the chain, attach the other jump ring. Then, attach the link that the lobster clasp will connect with.

Once that jump ring has been closed, you have yourself a brand spankin' new necklace! Now, wear it proudly because after all, you made it! :)

Thank you so much Kayla!!! It looks beautiful and fun to make!

I hope you all enjoyed it too!

xoxo,
 

Wednesday, November 21, 2012

Envelope~Bookmark DIY

Tomorrow is Thanksgiving Day!! Are you already cooking? I just found out I'm gonna have a few guests for dinner.. and the bad news is that my turkey is still almost completely frozen!!! I really hope it's ready tomorrow.. but why worry about that?? While the turkey sloooowly defrosts I decided to get crafty and make a few cute bookmarks with my kids. I found this easy tutorial on Pinterest, and I have recreated it for you. ;)
All you need is Envelopes, a pencil, colored paper, scissor and glue!


Draw a ♥ in the bottom corner of an envelope.


Cut it out.

Draw and decorate a ♥ on a piece of colored paper 
{you can also use some cute fabric or patterned paper}.

Cut the colored ♥ out and glue it on the envelope/heart/corner.. et voila'!! 
The envelope fits perfectly on the book page. Now you have a super cute bookmark!!
Super fun to make with the kids!!

xoxo,